|
Create Your Data Slice
To start, select the Data link on the left-hand menu bar. This will bring up a form you will use to specify which data you want.
Step 1 Name your data slice something simple but relevant. You will need to reuse this name throughout your data analysis. (More information on Naming)
Step 2 Choose whether you want email notification of your data query. Depending on the information requested, some queries could take up to several minutes to complete.
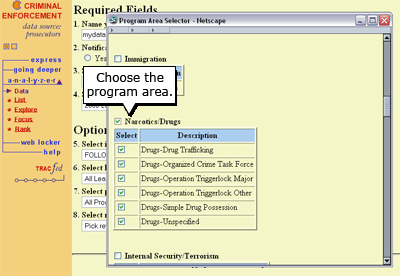
Step 3 Make other selections as necessary to create your data slice. The "select" links will produce pop-up windows with options; the pull-down menus will list the options you have chosen.
Required Fields (geographic area, fiscal year, and other choices for Civil data) are fields commonly used to create a data slice. Optional selection criteria provide other ways to specify which data you want.

Step 4 Click the "Create Data Slice" button. Your data will be created and stored in your Web Locker.
note: Web lockers have a total capacity of 20,000 records. If you have not chosen enough criteria in Step 3 to limit the size of your data slice, you may exceed this capacity. See Next Page for more information.
| 


